Introduction
There’s something undeniably magical about perfectly cooked BBQ ribs. That irresistible aroma wafting from the kitchen, the anticipation of biting into tender, succulent meat that effortlessly falls off the bone, and the sticky, sweet, and smoky glaze that coats every morsel – it’s a culinary experience that truly satisfies. Forget the grill for a moment, because we’re about to unlock the secret to restaurant-quality BBQ ribs right in your very own oven. This method promises consistent results, incredible flavor, and the ultimate convenience, proving that you don’t need fancy outdoor equipment to achieve BBQ bliss.
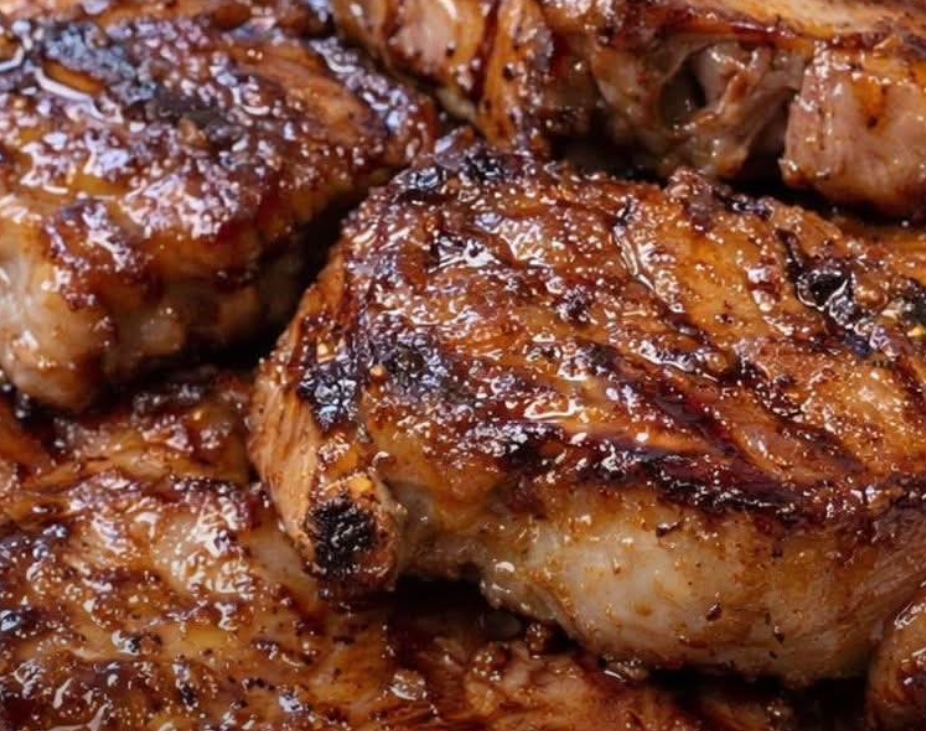
Our “Savor the Flavor: Oven-Baked BBQ Ribs” recipe is designed to deliver ribs that are so tender, so juicy, and so packed with flavor, they’ll become a staple in your home cooking repertoire. We’ll guide you through each step, from preparing the ribs with a savory dry rub to slow-baking them to perfection, and finally, basting them with a glorious BBQ sauce that caramelizes into a mouthwatering, sticky glaze. Get ready to impress your family and friends with ribs that taste like they came straight from a smokehouse, all thanks to the magic of your oven.
Nutritional Information
Per serving (approximate values):
- Calories: 650
- Protein: 45g
- Carbohydrates: 35g
- Fat: 35g
- Fiber: 2g
- Sodium: 950mg
Ingredients
- 2 racks (about 2.5-3 pounds each) pork baby back ribs or spare ribs
- 1 tablespoon brown sugar, packed
- 1 tablespoon smoked paprika
- 1 teaspoon garlic powder
- 1 teaspoon onion powder
- 1 teaspoon black pepper
- 1/2 teaspoon cayenne pepper (optional, for a kick)
- 1 teaspoon salt
- 1/4 cup apple cider vinegar
- 1 cup your favorite BBQ sauce (store-bought or homemade)
- 2 tablespoons honey or maple syrup (optional, for extra glaze)
Instructions
- Prepare the Ribs: Carefully remove the thin membrane from the back of each rack of ribs. To do this, slide a knife under the membrane at one end of the rack, then grip it with a paper towel and pull it off. This step is crucial for tender ribs. If you have trouble, ask your butcher to do it for you.
- Make the Dry Rub: In a small bowl, combine the brown sugar, smoked paprika, garlic powder, onion powder, black pepper, cayenne pepper (if using), and salt. Mix well until all ingredients are evenly distributed.
- Season the Ribs: Pat the ribs dry with paper towels. Generously rub the spice mixture all over both sides of the ribs, ensuring an even coating. For best results and deeper flavor, you can cover the seasoned ribs and refrigerate them for at least 2 hours, or preferably overnight. If not marinating, proceed directly to the next step.
- Preheat Oven and Prepare for Baking:Preheat your oven to 275°F (135°C). Line a large baking sheet with heavy-duty aluminum foil, ensuring enough overhang to wrap completely around the ribs. Place a wire rack on top of the foil-lined baking sheet. This allows for even air circulation around the ribs.
- First Bake (Wrapped): Place the seasoned ribs on the wire rack. Pour the apple cider vinegar into the bottom of the foil-lined baking sheet, under the wire rack (this creates steam for extra tenderness). Tightly wrap the ribs in the aluminum foil, sealing the edges to create a packet. Ensure no steam can escape.
- Slow Bake: Bake the wrapped ribs in the preheated oven for 2.5 to 3 hours. The exact time will depend on the thickness of your ribs. They are ready when the meat is very tender and has pulled back from the ends of the bones, but not falling apart entirely.
- Prepare the Glaze: While the ribs are baking, in a small bowl, whisk together your favorite BBQ sauce and the optional honey or maple syrup. Set aside.
- Second Bake (Unwrapped and Glazed):Carefully remove the baking sheet from the oven. Increase the oven temperature to 375°F (190°C). Unwrap the foil from the ribs, being careful of the hot steam. Discard any accumulated liquid in the foil.
- Baste and Caramelize: Brush a generous layer of the BBQ sauce mixture over the top of the ribs. Return the unwrapped ribs to the oven (still on the wire rack over the foil-lined baking sheet). Bake for another 20-30 minutes, basting with more BBQ sauce every 10 minutes, until the sauce is sticky, caramelized, and slightly browned. Watch carefully to prevent burning.
- Optional Broil for Extra Crispness: For an even crispier, more lacquered finish, you can briefly broil the ribs for 2-5 minutes at the very end. Keep a very close eye on them, as BBQ sauce can burn quickly under the broiler.
- Rest and Serve: Once the ribs are beautifully glazed, remove them from the oven. Let them rest for 10-15 minutes before slicing between the bones and serving. Resting allows the juices to redistribute, resulting in more tender and flavorful ribs.
Cooking Tips and Variations
For truly fall-off-the-bone ribs, the key is “low and slow.” Don’t be tempted to rush the initial baking process by increasing the oven temperature. The long, gentle heat is what breaks down the tough connective tissues, resulting in incredibly tender meat. The apple cider vinegar in the foil packet creates a steamy environment that further aids in tenderizing the ribs, adding moisture and a subtle tang. When removing the membrane, if you find it slippery, using a paper towel to grip it provides much-needed traction. This simple step makes a huge difference in the final texture of your ribs, as the membrane can become tough and chewy if left on.
To vary the flavor profile, consider experimenting with your dry rub. For a spicier kick, increase the amount of cayenne pepper or add a pinch of chili flakes. If you prefer a more herbal note, a touch of dried oregano or thyme can be a delightful addition. For a sweeter rub, you can add an extra tablespoon of brown sugar. You can also customize your BBQ sauce. While a good quality store-bought sauce works wonderfully, don’t hesitate to enhance it. Stir in a tablespoon of Worcestershire sauce for umami, a dash of hot sauce for heat, or even a spoonful of apricot preserves for a fruity twist. For a smoky variation without liquid smoke, you can use a few drops of liquid smoke in your BBQ sauce or dry rub, but be careful as a little goes a long way. Another option is to use smoked salt in your dry rub. If you prefer a thinner, saucier glaze, you can thin out your BBQ sauce with a little extra apple cider vinegar or even some orange juice. Conversely, for a thicker, more spoon-able sauce, you can gently simmer your BBQ sauce on the stovetop for a few minutes to reduce it slightly before basting. For those who enjoy a bit of char, finishing the ribs on a hot grill for a few minutes per side after the oven-baking can add a fantastic smoky flavor and crisp texture to the glaze. Just be sure to watch them closely to avoid burning.
Serving these oven-baked BBQ ribs with complementary side dishes elevates the entire meal. Classic pairings like creamy coleslaw, fluffy cornbread, and hearty baked beans are always a hit. Other excellent choices include mashed potatoes, potato salad, macaroni and cheese, or a simple green salad to cut through the richness of the ribs. For a lighter touch, grilled corn on the cob or roasted vegetables like asparagus or broccoli would also be delicious. Don’t forget some extra BBQ sauce on the side for dipping! Presentation matters too; arrange the sliced ribs neatly on a platter, perhaps garnished with some fresh parsley or cilantro for a pop of color. For a more casual presentation, you can serve them directly from the baking sheet. Remember to allow the ribs to rest for at least 10-15 minutes after they come out of the oven. This crucial step allows the juices to redistribute throughout the meat, ensuring every bite is incredibly tender and moist. Cutting into them too soon will cause the juices to run out, leading to drier ribs. Patience is a virtue when it comes to perfect BBQ!
Storage and Reheating
To store leftover oven-baked BBQ ribs, allow them to cool completely to room temperature. Once cooled, transfer the ribs to an airtight container or wrap them tightly in aluminum foil. They can be stored in the refrigerator for up to 3-4 days. For longer storage, you can freeze individual portions or whole racks. Wrap the ribs tightly in plastic wrap, then an additional layer of aluminum foil, or place them in a freezer-safe bag or container. Frozen ribs will keep for up to 2-3 months. Thaw frozen ribs in the refrigerator overnight before reheating.
The best way to reheat oven-baked BBQ ribs without drying them out is to use your oven. Preheat your oven to 250°F (120°C). Place the ribs in an oven-safe dish with a splash of water or broth, or brush with a little extra BBQ sauce to help retain moisture. Cover the dish tightly with aluminum foil. Heat for 20-30 minutes, or until heated through. For a quick reheat, you can also use a microwave, but be aware that this method can sometimes make the meat a bit tougher. If using a microwave, place ribs on a microwave-safe plate, cover loosely, and heat in short bursts until warm. You can also reheat on a grill over medium-low heat, turning frequently, until warmed through and slightly charred. Avoid overheating, as this will dry out the meat.
Frequently Asked Questions
How do I know when my ribs are done?
The best way to tell if oven-baked ribs are done is by their tenderness. When gently lifted with tongs, the meat should be very tender and pull away from the bone easily, but not completely fall off. Another good indicator is if the meat has pulled back from the ends of the bones by about a quarter of an inch. You can also insert a meat thermometer into the thickest part of the meat, avoiding the bone; a temperature of 190-203°F (88-95°C) indicates perfectly tender ribs.
Can I use a different type of rib?
Yes, while baby back ribs are popular for their tenderness and lean meat, you can certainly use spare ribs or St. Louis-style ribs for this recipe. Spare ribs are larger and meatier, requiring a slightly longer cooking time (add about 30-60 minutes to the initial baking time). St. Louis-style ribs are spare ribs that have been trimmed to a more uniform, rectangular shape. The cooking method remains the same, but always adjust cooking times based on the thickness and type of ribs you are using.
My ribs turned out dry, what went wrong?
Dry ribs are usually a result of overcooking or not enough moisture during the initial baking phase. Ensure you wrap the ribs tightly in foil with the apple cider vinegar to create a steamy environment, which helps keep them moist. Also, avoid baking them at too high a temperature for too long. If your oven runs hot, you might need to adjust the temperature down slightly. Make sure to remove the membrane, as a tough membrane can prevent moisture from penetrating the meat.
Can I prepare the ribs ahead of time?
Absolutely! You can prepare the ribs by removing the membrane and applying the dry rub up to 24 hours in advance. Store them covered in the refrigerator. This actually helps to deepen the flavor. You can also fully cook the ribs through the initial slow-bake step, let them cool, and then refrigerate them. When you’re ready to serve, simply proceed with the unwrapping, basting, and final baking steps until they are heated through and beautifully glazed. This makes them a great option for meal prepping or entertaining.